Ford Mustang (1999-2004) Service Manual: Crankshaft Pulley
Special Tool(s)
 |
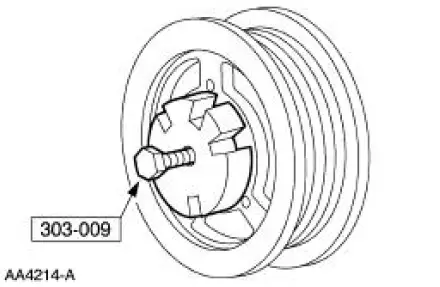
Remover, Crankshaft Vibration Damper 303-009 (T58P-6316-D) |
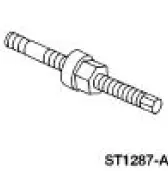 |
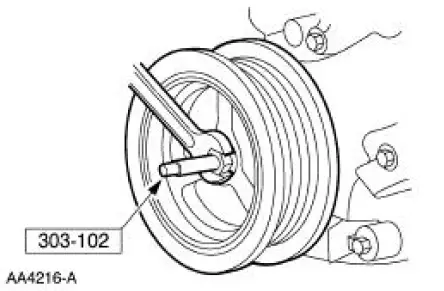
Installer, Crankshaft Vibration Damper 303-102 (T74P-6316-B) |
Material
| Item | Specification |
| Silicone Gasket and Sealant F7AZ-19554-EA or equivalent | WSE-M4G323-A4 |
Removal
1. Remove the drive belt. For additional information, refer to Section.
2. Raise and support the vehicle. For additional information, refer to Section.
3. Remove the bolt.
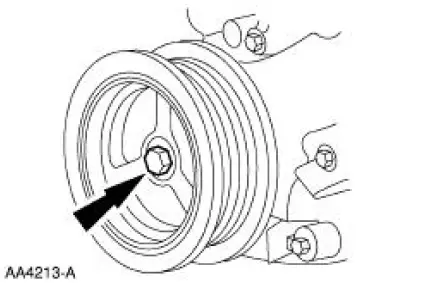
4. Using the special tool, remove the crankshaft pulley (6312).
Installation
1. NOTE: The crankshaft pulley must be installed within four minutes of applying the sealant.
Apply sealant to the woodruff key slot on the crankshaft pulley.

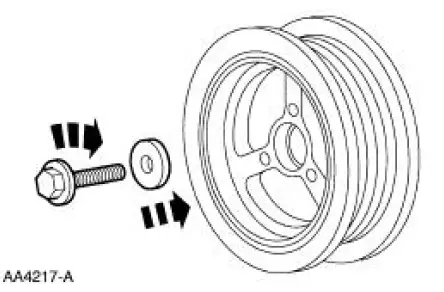
2. Using the special tool, install the crankshaft pulley.
3. Install the washer and the bolt. Tighten the bolt in four stages.
- Stage 1: Tighten the bolt to 90 Nm (66 lb-ft).
- Stage 2: Loosen the bolt one full turn.
- Stage 3: Tighten the bolt to 50 Nm (37 lb-ft).
- Stage 4: Tighten the bolt an additional 90 degrees.
4. Lower the vehicle.
5. Install the drive belt. For additional information, refer to Section.
 Valve Cover LH
Material
Item
Specification
Silicone Gasket and Sealant
F7AZ-19554-EA or equivalent
WSE-M4G323-A4
Removal and Installation
1. Position the oil level tube (6754) out of the way.
2 ...
 Crankshaft Front Oil Seal
Special Tool(s)
Crankshaft Seal
Installer/Aligner
303-335 (T88T-6701-A)
Front Cover Seal Remover
303-107 (T74P-6700-A)
Crankshaft Seal Installer
303-635
...
Other materials:
Rear Drive Axle and Differential
The differential housing (4010) consists of a cast aluminum housing and
a cast aluminum
differential housing cover (4033). The differential housing cover uses
silicone sealant as a
gasket.
The hypoid-design gearset consists of a 8.8-inch ...
Fog Lamps
Refer to Wiring Diagrams Cell 86 , Fog Lamps for schematic and connector
information.
Special Tool(s)
73 III Automotive Meter or
equivalent
105-R0057
Principles of Operation
The fog lamps will only illuminate when the low beam or parking l ...
Transmission (DISASSEMBLY)
Special Tool(s)
Slide Hammer
100-001 (T50T-100-A)
Holding Fixture, Transmission
307-003 (T57L-500-B)
Slide Hammer
307-005 (T59L-100-B)
Remover, Transmission Fluid
Seal
307-048 (T74P-77248-A)
...
