Ford Mustang (1999-2004) Service Manual: Motor - Window Regulator
Removal
1. Remove the door trim panel. For additional information, refer to Section.
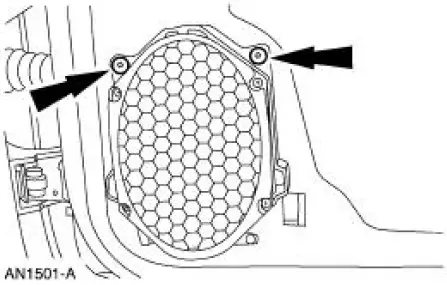
2. Remove the screws and the speaker.
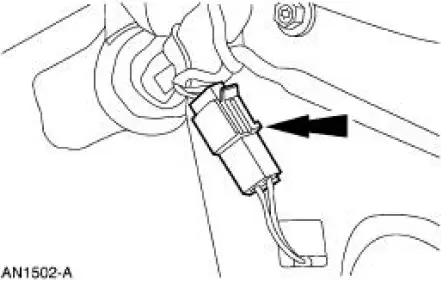
3. Disconnect the electrical connector.
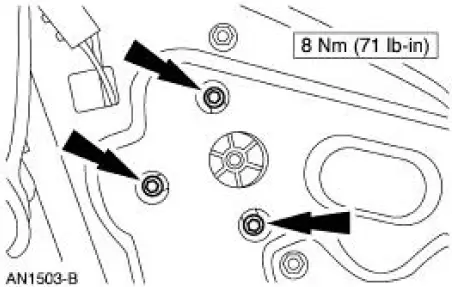
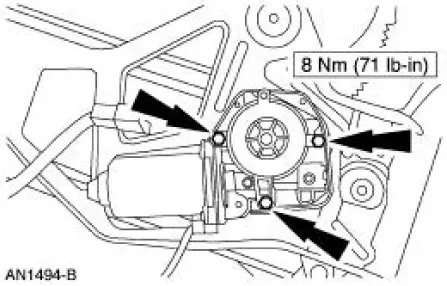
4. Remove the screws and the window regulator motor.
Installation
1. To install, reverse the removal procedure.
Motor -Window Regulator, Quarter
Removal
1. Remove the quarter trim panel. For additional information, refer to Section.
2. Remove the watershield.
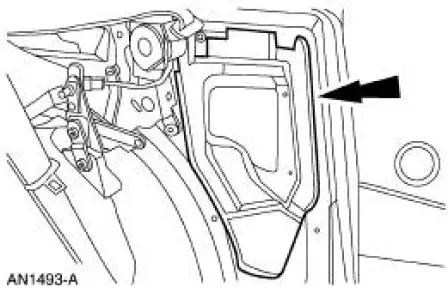
3. Remove the quarter glass window regulator motor.
Installation
1. To install, reverse the removal procedure.
 Window Glass - Quarter, Convertible
Removal
1. Remove the quarter trim panel. For additional information, refer
to Section.
2. Disconnect the connectors and remove the screw.
3. Remove the screw.
4. Remove the screw and the ...
 Window Regulator - Power
Removal
1. Remove the door window glass. For additional information, refer to
Window Glass-Door in this
section.
2. Disconnect the electrical connector.
3. Remove the channel.
4. Remove ...
Other materials:
Closing the convertible top
Note: The convertible top will not operate unless the vehicle is
stationary or traveling under 3 mph (5 kmh).
Note: Make sure that the latch handles are pulled down and in the fully
opened position before the top makes contact with the windshield
header. This ...
Anti-Lock Control
Refer to Wiring Diagrams Cell 42 , Anti-Lock Brake for schematic and
connector information.
Special Tool(s)
Worldwide Diagnostic System
(WDS)
418-F224,
New Generation STAR (NGS)
Tester
418-F052, or equivalent scan
tool
73 Digita ...
Fuel cut-off switch
WARNING: Failure to inspect and if necessary repair fuel leaks
after a collision may increase the risk of fire and serious injury.
Ford Motor Company recommends that the fuel system be inspected by
an authorized dealer after any collision.
In the event of a m ...
